How to Make a Salmon Sushi Bake at Home
Salmon Sushi Bake at Home
Have you ever craved the flavors of your favorite sushi roll but wanted something warm and comforting? A sushi bake is the perfect solution. This dish combines the best of both worlds—creamy, savory layers and the familiar taste of sushi—all in one easy-to-make casserole.
In this guide, you’ll learn how to create this crowd-pleasing dish right in your own kitchen. With step-by-step instructions and tips from trusted recipes, you’ll master the art of layering seasoned rice, a creamy mixture, and vibrant toppings. Whether it’s for a family dinner or a gathering with friends, this recipe is sure to impress.
What makes this dish so special is its versatility. You can customize it with your favorite ingredients, from spicy mayo to crunchy sesame seeds. Plus, it’s a great way to enjoy the flavors of sushi without the hassle of rolling. Ready to get started? Let’s dive in!
Table of Contents
Key Takeaways
- Learn how to make a delicious sushi-inspired casserole at home.
- Follow detailed steps to layer seasoned rice, creamy mixtures, and toppings.
- Customize the dish with your favorite ingredients for a personal touch.
- Perfect for family dinners or gatherings with friends.
- Enjoy the flavors of sushi without the need for rolling.
Introduction to Your Salmon Sushi Bake Adventure
Ready to explore a modern take on a classic favorite? The sushi bake trend has taken social media and food blogs by storm, offering a fresh twist on traditional flavors. This dish is a deconstructed version of sushi, layered with seasoned rice, creamy mixtures, and vibrant toppings, all baked to perfection.
Discover the Inspiration Behind This Dish
The sushi bake craze began as a creative reinterpretation of sushi, inspired by the need for comfort food that’s easy to make. Social media platforms like Instagram and TikTok have showcased countless variations, making it a go-to recipe for home cooks. As one food blogger put it,
“It’s not about authenticity—it’s about fun, flavor, and convenience.”
What Makes This Recipe a Game-Changer?
This dish stands out for its unique combination of flavors and textures. The tang of rice vinegar pairs perfectly with the richness of cream cheese and savory salmon. Plus, it’s incredibly versatile—you can swap ingredients to suit your taste.
Unlike traditional sushi, this recipe eliminates the need for rolling, making it accessible even for beginners. It’s perfect for busy weeknights or gatherings with friends. Here’s a quick breakdown of what makes it special:
| Feature | Benefit |
|---|---|
| Easy Preparation | No rolling required—just layer and bake. |
| Customizable | Swap ingredients to create your own version. |
| Comfort Food | Warm, creamy, and satisfying. |
Whether you’re a seasoned cook or just starting out, this recipe offers a stress-free way to enjoy the flavors of sushi. Get ready to dive into a detailed journey of preparation and creativity!
Ingredients and Preparations for a Perfect Salmon Sushi Bake
Every great recipe starts with quality ingredients and careful preparation. For a standout sushi bake, the right components and proper techniques are key. This section will guide you through the essentials and offer helpful substitutions to tailor the dish to your taste.
Essential Ingredients Overview
To create this flavorful dish, you’ll need a few key ingredients. Start with sushi rice, which forms the base. Season it with rice vinegar, sugar, and salt for that authentic taste. For the creamy layer, combine cream cheese, kewpie mayo, and a touch of sriracha for a hint of spice.
The star of the dish is the salmon, which should be baked until tender and flaky. Top it off with furikake seasoning for added umami and texture. Here’s a quick list of essentials:
- 1 ½ cups sushi rice
- ¼ cup rice vinegar
- 8 oz salmon filet
- 3 oz cream cheese
- ⅓ cup kewpie mayo
- 2 tbsp sriracha
- 4 tbsp furikake seasoning
Substitutions and Alternative Options
Don’t have all the ingredients? No problem. Swap soy sauce with coconut aminos for a gluten-free option. If fresh salmon isn’t available, canned salmon works just as well. For a lighter twist, use Greek yogurt instead of cream cheese.
Customize the dish to your liking. Add avocado or cucumber for freshness, or mix in imitation crab for a different flavor profile. The possibilities are endless, making this recipe adaptable to your pantry and preferences.
Mastering the Salmon Sushi Bake Process
Creating a standout dish at home starts with mastering the basics. The sushi bake process involves two key steps: preparing the rice and cooking the salmon. Each step requires attention to detail to ensure the final dish is flavorful and well-balanced.

Preparing the Rice and Seasonings
Begin with the rice, the foundation of your dish. Use sushi rice for its sticky texture, which helps hold the layers together. Cook it according to package instructions, usually about 25 minutes. Once cooked, transfer it to a large bowl.
Season the rice with a mixture of rice vinegar, sugar, and salt. Gently fold the seasoning into the rice to avoid mashing the grains. Properly seasoned rice adds a tangy flavor that complements the creamy layers.
Cooking and Shredding the Salmon
Next, focus on the salmon. Preheat your oven to 375°F (190°C). Place the salmon on a baking sheet and bake for about 12 minutes, or until it’s tender and flaky. Avoid overcooking to maintain its moisture.
Once baked, let the salmon cool slightly before removing the skin. Use a fork to shred it into small pieces. Combine the shredded salmon with kewpie mayo, sriracha, and a dash of soy sauce for a flavorful mixture.
Handle the salmon gently during shredding to preserve its texture. This step ensures the final dish has a balanced mix of creamy and flaky elements.
Layering Techniques for Maximum Flavor
Layering is the secret to a flavorful and visually appealing dish. By carefully arranging each component, you ensure every bite is balanced and satisfying. Let’s break down the steps to achieve the perfect layers for your sushi bake.

Creating the Perfect Rice Base
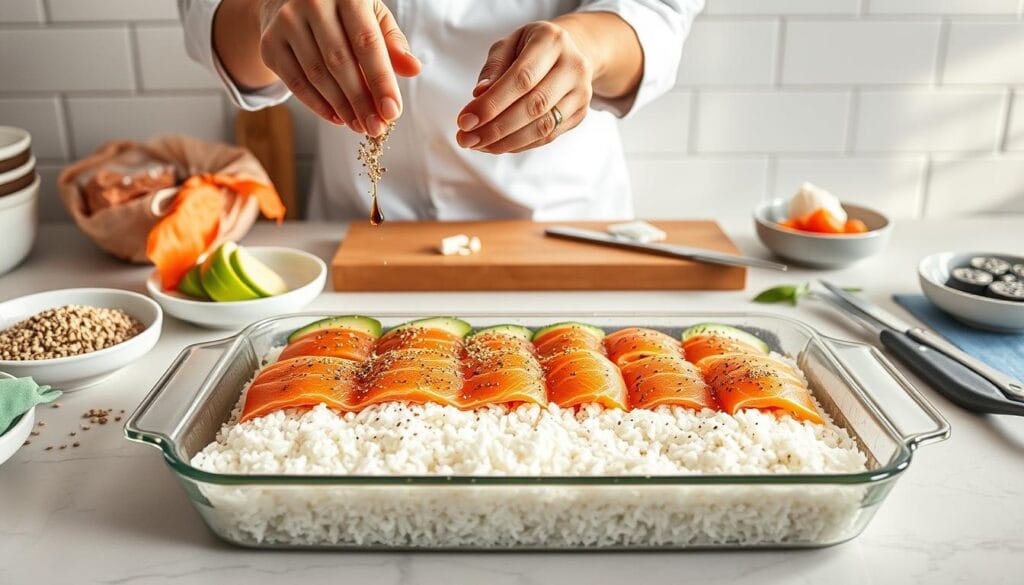
Start with a sturdy foundation by spreading the cooked sushi rice evenly in your baking dish. Use the back of a spoon to press it down gently, creating a compact layer. This step ensures the rice holds together and supports the creamy mixture above.
Season the rice with a mix of rice vinegar, sugar, and salt for an authentic flavor. Properly seasoned rice adds a tangy note that complements the richness of the other layers.
Forming the Creamy Salmon Mixture
Next, combine the shredded salmon with kewpie mayo, sriracha, and a dash of soy sauce. Mix until the ingredients are well incorporated, creating a creamy and slightly spicy mixture.
Spread this mixture evenly over the rice layer. Be gentle to avoid disrupting the rice base. The creamy texture of this layer adds richness and depth to the dish.
Enhancing with Toppings and Garnishes
Finish by sprinkling furikake seasoning over the top for a burst of umami. Add optional garnishes like chopped scallions, sesame seeds, or sliced cucumbers for extra flavor and color.
For a golden finish, bake the dish for 10 minutes, then broil for 2-3 minutes. Keep an eye on it to avoid over-baking. The result is a lightly golden top that’s both visually appealing and delicious.
With these layering techniques, your sushi bake will be a crowd-pleaser, combining textures and flavors in every bite.
Tips for Customizing Your Sushi Bake Recipe
Want to make your dish truly unique? Customization is the key. This recipe is designed to be flexible, allowing you to tweak it to suit your preferences. Whether you love spicy flavors or prefer a creamier texture, small adjustments can make a big difference.
Adjusting Spice and Sauces
One of the easiest ways to personalize your dish is by adjusting the spice level. If you enjoy heat, add an extra tablespoon of sriracha to the creamy mixture. For a milder version, reduce the amount or skip it entirely. You can also experiment with different types of mayo. Kewpie mayo adds a rich, creamy texture, while light mayo offers a healthier alternative.
Balancing flavors is essential. A dash of rice vinegar can enhance the tanginess, while a teaspoon of soy sauce adds depth. Taste the mixture before baking to ensure the flavors are just right. Here’s a quick guide to help you customize:
| Ingredient | Adjustment | Effect |
|---|---|---|
| Sriracha | Increase by 1 tbsp | Adds more heat |
| Mayo | Use kewpie mayo | Enhances creaminess |
| Rice Vinegar | Add 1 tsp | Boosts tanginess |
Don’t be afraid to experiment with toppings. Sprinkle extra furikake seasoning for umami or add chopped scallions for freshness. The beauty of this recipe is its adaptability—make it your own and enjoy the process!
Serving Suggestions and Storage Ideas
Looking for a dish that’s both impressive and easy to serve? This recipe is perfect for any occasion, whether it’s a family dinner or a party with friends. With a few simple tips, you can elevate your presentation and ensure your meal stays fresh for days.
Presentation Tips for a Tasty Display
Start by cutting your creation into neat squares. This makes it easy to serve and adds a professional touch. Garnish each piece with fresh scallions, a sprinkle of furikake seasoning, or thin cucumber slices for extra crunch.
Pair your dish with complementary sides like tortilla chips or nori squares. These add texture and make it fun to enjoy. For a warm option, serve it fresh from the oven. If you prefer a chilled version, let it cool for 10 minutes before slicing.
Storing Leftovers and Best Practices
To keep your meal fresh, cool it completely before storing. Place leftovers in an airtight container and refrigerate for up to two days. This helps maintain the flavors and textures.
When reheating, use the oven at 350°F for 5-10 minutes. Avoid the microwave, as it can make the rice soggy. A well-stored dish not only tastes great but also makes a convenient meal for busy days.
With these tips, your dish will be a hit at any gathering. Enjoy the process of creating and sharing this flavorful meal!
Conclusion
Transform your kitchen into a culinary haven with this innovative dish. By now, you’ve mastered the art of layering seasoned rice, a creamy mixture, and flavorful toppings. This recipe is not just easy but also incredibly versatile, making it perfect for family dinners or gatherings with friends.
The final product combines the comforting warmth of baked rice with gourmet touches from specialty sauces like mayo and cream cheese. Don’t hesitate to experiment with extra garnishes or adjust the spice level to suit your taste. The possibilities are endless, and each variation can make the dish uniquely yours.
Share your creations on social media and connect with a community of enthusiasts. With careful attention to each step, this dish will become a game-changer in your home cooking repertoire. Enjoy the process and savor every bite!

